

Many parents want to start with the alphabet as soon as their child can hold a pencil. It makes sense: letters feel like the first “real” step toward school. But children who jump straight into writing letters often get frustrated, grip the pencil too tightly, or give up quickly.
The missing piece is pre-writing skills. In this guide you will learn what they are, the five stages to follow in order, easy activities you can do at home, and the signs that your child is ready for letters.
What Are Pre-Writing Skills?
Pre-writing skills are the small abilities a child needs before they can write letters and numbers comfortably. They include hand and finger strength, a comfortable pencil grip, hand-eye coordination, and the ability to draw basic lines and shapes with control.
In short: before a child can write the letter A, they need to be able to draw a diagonal line. Before they can write B, they need straight lines and curves. Letters are simply combinations of these basic strokes.
Pre-writing skills cover more than drawing lines. They include:
- Hand and finger strength: the muscles that squeeze, pinch and hold a pencil.
- Hand-eye coordination: looking at a target and guiding the hand to it.
- Pencil grip: holding a tool comfortably and with control.
- Using both hands together: one hand steadies the paper while the other draws.
- Visual perception: noticing shapes, directions, and where a line starts and ends.
- Attention: staying with a short task long enough to finish it.
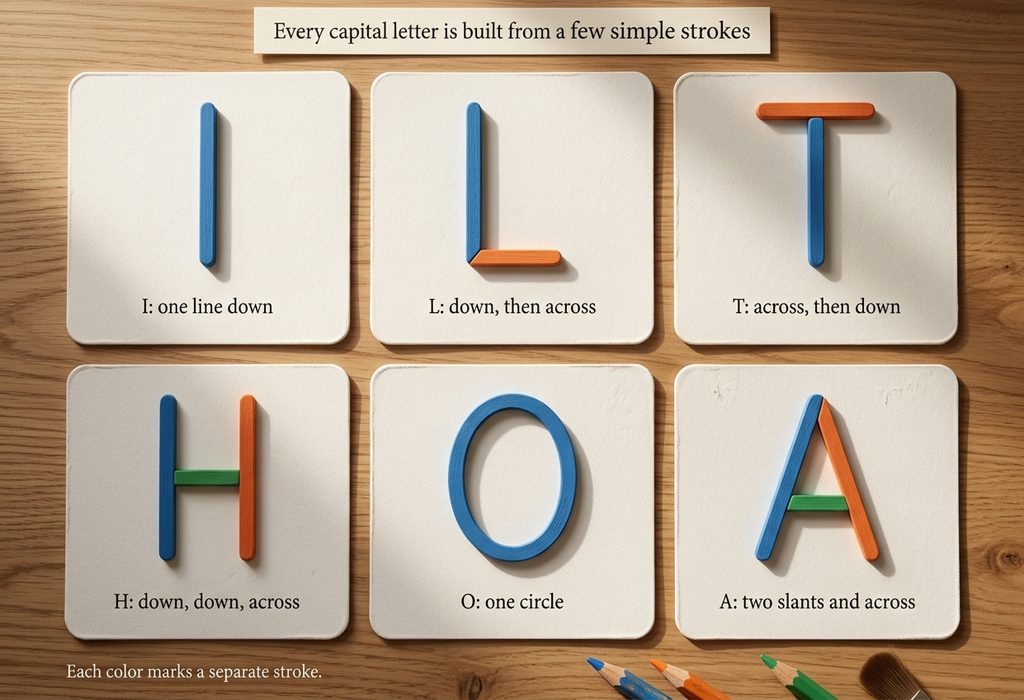
Letters are combinations of the lines and circles children practice first, which is why strokes come before letters.
Why Not Start With Letters?
Writing is a demanding task for a young child. They have to remember what the letter looks like, control small muscles in the fingers, and guide the pencil with their eyes, all at the same time.
If the hand is not ready, writing becomes tiring and frustrating. Building pre-writing skills first makes letter writing easier, and it is more fun for your child, too.
Every child develops at their own pace. The ages below are only a rough guide, so follow your child rather than the calendar.
The 5 Stages of Pre-Writing
Here is the path at a glance. Each step prepares the hand for the next.
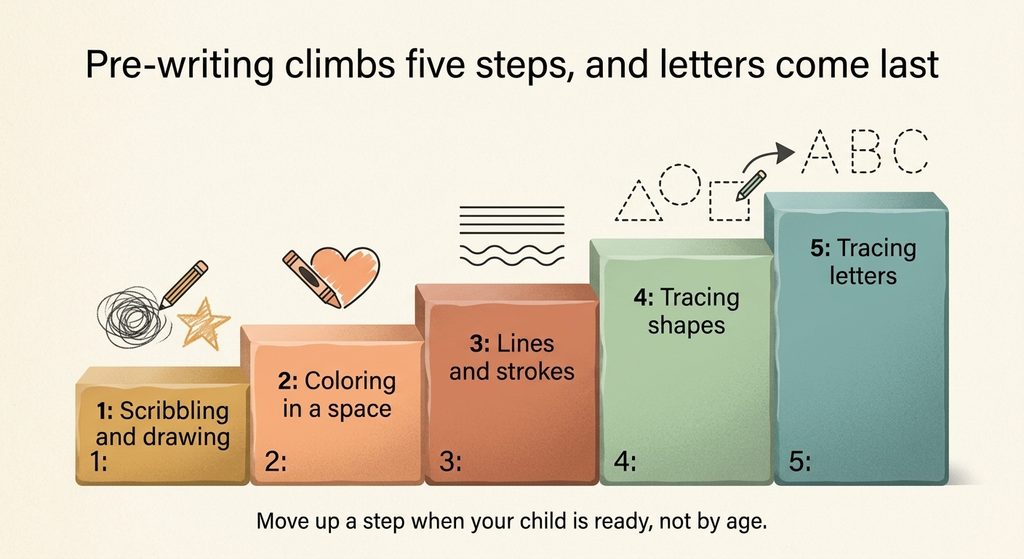
Stage 1: Scribbling and free drawing
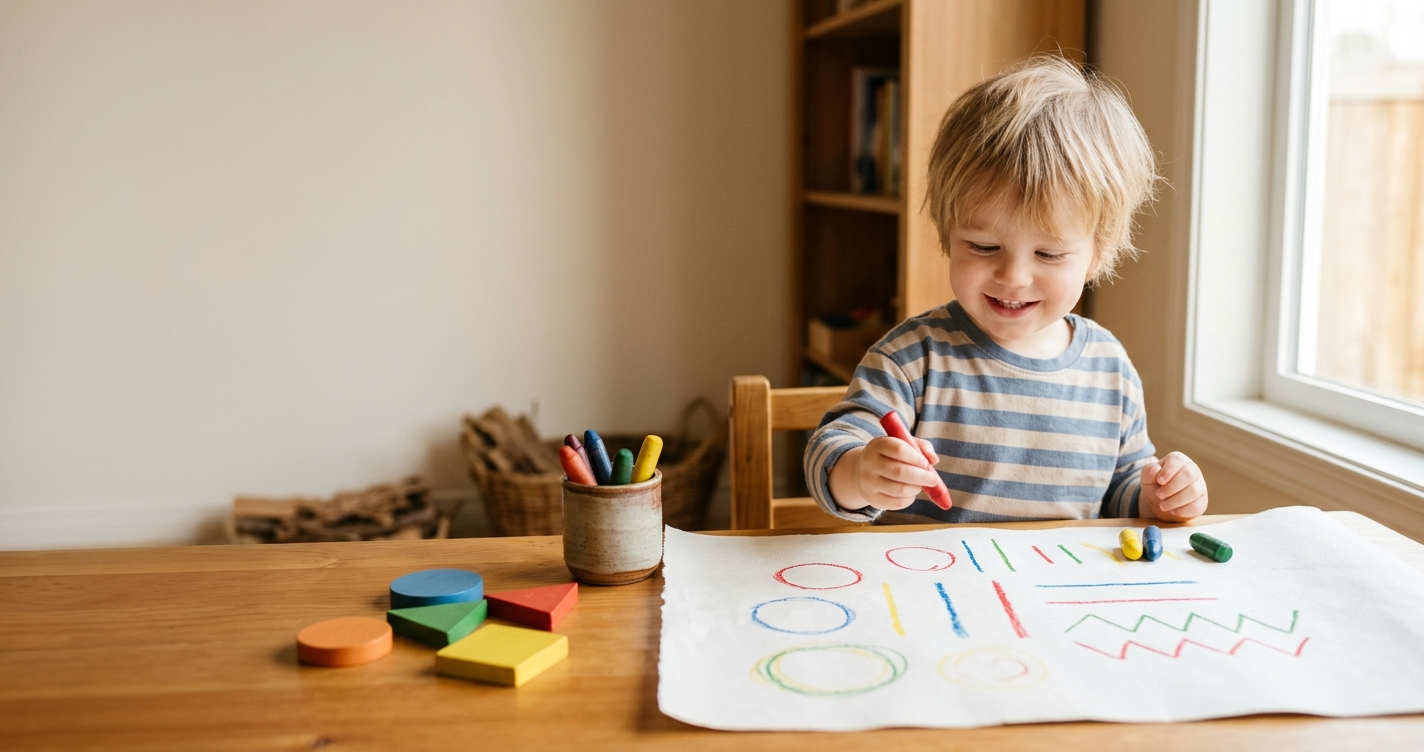
It all starts with scribbles. Scribbling teaches children that their hand movements leave marks on paper, and it builds arm and shoulder strength.
What to do: offer large paper, chunky crayons and washable markers. Do not correct or direct them yet. Just let them draw.
Why it matters: big, free movements build the shoulder and arm strength that small, precise movements depend on. Move on when: your child makes deliberate marks, such as dots, lines or circles, rather than only random scribbles.
Stage 2: Coloring and staying in the space
Coloring helps children practice grip, pressure control and hand-eye coordination. At first, expect colors to go everywhere. That is normal.
What to do: start with large, simple pictures and gradually move to smaller ones as control improves. Short sessions of 5 to 10 minutes work better than long ones.
Why it matters: staying inside a space teaches your child to control where the crayon goes. Move on when: most of the color lands inside the picture, even if it is messy. Chunky crayons and large shapes make this stage easier.
Stage 3: Lines and strokes
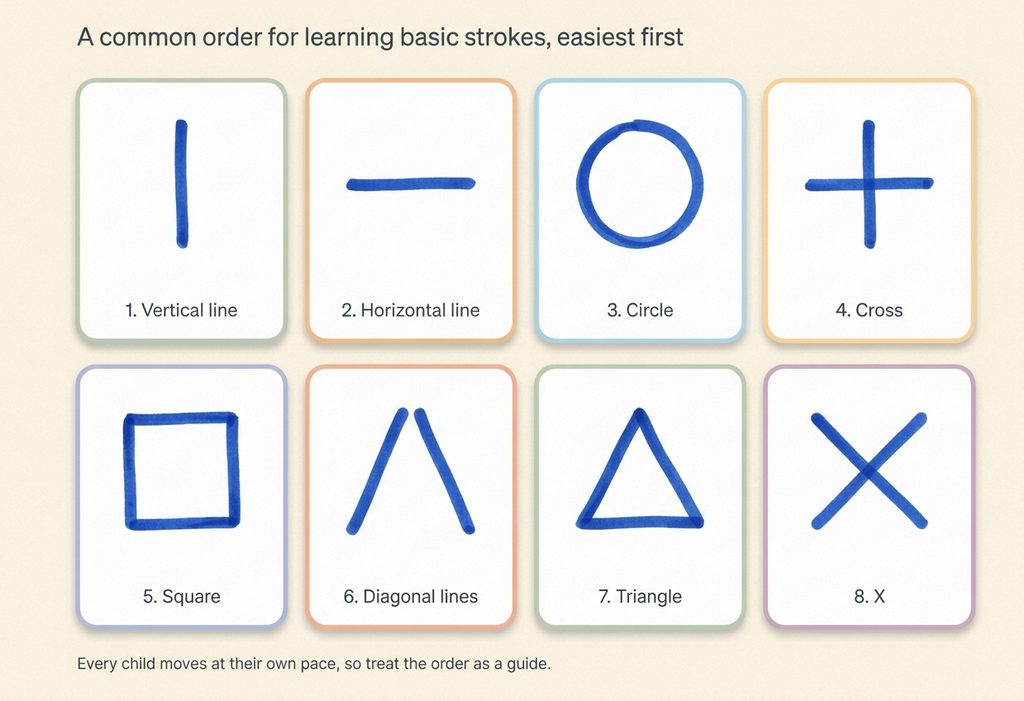
Now your child practices the building blocks of letters. A common order, from easiest to hardest, is:
- Vertical line (|)
- Horizontal line (—)
- Circle (O)
- Cross (+)
- Square
- Diagonal lines (/ and )
- Triangle
- X
Most children master these gradually between about ages 2 and 5. Do not rush the harder shapes.
What to do: draw “roads” for toy cars, “rain” (vertical lines) and “ladders” (horizontal lines). Turning strokes into a game keeps it playful.
Tip: let your child draw each stroke in the air or with a finger before using a crayon. Move on when: they can copy a line or shape you draw, not only trace it.
Stage 4: Tracing shapes and patterns
Tracing teaches children to follow a path, start and stop at the right place, and change direction. Wavy lines, zigzags and loops are great practice.
What to do: use tracing worksheets with dotted lines, or let your child trace shapes with a finger first, then a crayon, then a pencil.
Why it matters: tracing teaches the starting point, direction and stopping point of a stroke, exactly what letter writing needs. Tip: begin with wide, thick paths and move to narrower ones. Move on when: they follow most lines without leaving the path.
Stage 5: Tracing letters
Only now is your child ready for letter tracing. Because they already know the strokes, letters feel familiar rather than overwhelming.
What to do: begin with letters made of simple lines, such as I, L, T, H, then move to curved letters like C, O, S. Teach the correct starting point and direction for each letter from the beginning, so good habits form early.
Tip: keep each letter to a few tries, then stop. Say the stroke aloud as you draw, for example “down, then across”, to give your child a simple routine to follow.
Simple Pre-Writing Activities to Try at Home
You do not need special materials. These ideas build hand strength and control while feeling like play:
- Playdough: rolling, squeezing and pinching strengthen the small muscles in the hand.
- Drawing in sand, salt or rice: a tray with a thin layer lets children practice strokes with their finger and wipe it clean to try again.
- Sidewalk chalk: large movements help build arm control before small movements.
- Stickers: peeling and placing stickers trains the pincer grip.
- Tongs and tweezers: moving pom-poms or beans from one bowl to another is great finger practice.
- Threading beads or pasta: builds hand-eye coordination.
- Cutting with child-safe scissors: strengthens the same muscles used for writing.
- Painting with a brush: encourages controlled wrist and finger movement.
How to Hold a Crayon or Pencil
Grip develops in stages too. Young children often hold a crayon in a fist. Over time, they move to holding it with the fingers, and finally to the tripod grip, where the pencil rests between the thumb and the first two fingers.
To encourage a good grip:
- Use short crayons or broken pieces so little fingers must pinch.
- Try drawing on a vertical surface, such as paper taped to a wall or an easel. This strengthens the wrist and shoulder.
- Model the grip gently, but do not force it. Comfort matters more than perfection at this age.
Signs Your Child Is Ready for Letters
Every child is different, but these signs suggest your child may be ready to start tracing and writing letters:
- They can copy basic lines and shapes, such as a circle and a cross.
- They show interest in letters, especially the ones in their own name.
- They can hold a crayon or pencil with their fingers instead of a fist.
- They can stay focused on a drawing or coloring activity for a few minutes.
- They are starting to prefer one hand for drawing.
If your child is not there yet, that is perfectly fine. Keep playing with the activities above and try again in a few weeks.
A Simple Weekly Practice Plan
Ten minutes a day is enough. Here is one way to rotate activities through the week; adjust it to whichever stage your child is on.
| Day | Activity | Skill it builds |
|---|---|---|
| Monday | Playdough rolling and pinching | Hand and finger strength |
| Tuesday | Chalk lines on the pavement | Large arm movements, stroke practice |
| Wednesday | Coloring a large picture | Grip and control |
| Thursday | Strokes in a sand or salt tray | Line and shape control |
| Friday | Tracing worksheet | Following a path |
| Saturday | Free drawing or painting | Creativity and confidence |
| Sunday | Threading beads or sticker play | Pincer grip, hand-eye coordination |
What to Gather: A Simple Pre-Writing Toolkit
You can start with items you already have. A few extras make practice easier:
- Chunky crayons and short pencils
- Washable markers and large sheets of paper
- Chalk and a pavement or chalkboard
- Playdough
- A shallow tray with sand, salt or rice
- Child-safe scissors
- Tongs or tweezers with pom-poms or beans
- Beads and string, or dry pasta for threading
- Stickers
- A printable pre-writing worksheet
Tips for Left-Handed Children
Some children are still settling on a preferred hand in the preschool years, so let your child choose rather than switching them. If your child is left-handed:
- Let them find a paper angle that lets them see what they have just drawn.
- Encourage holding the crayon or pencil a little higher up, which helps prevent smudging.
- Seat them where their drawing arm has room and will not bump a neighbor.
- Show new strokes by sitting beside your child instead of across from them, so they can copy the movement.
Common Mistakes to Avoid
- Starting with letters too early. This is the most common mistake and the quickest way to create frustration.
- Correcting every line. Encouragement keeps children motivated. Focus on effort, not perfection.
- Long practice sessions. Short, frequent sessions work better than one long one.
- Forcing a grip. Pushing a “correct” grip too soon can make children dislike drawing.
- Comparing children. Development varies widely in the preschool years.
Frequently Asked Questions
At what age should a child start writing letters?
Most children begin forming some letters between ages 4 and 5, but readiness matters more than age. If your child can already draw circles, crosses and simple lines, they are likely getting close.
Is coloring really helpful for writing?
Yes. Coloring builds grip, pressure control and hand-eye coordination, which are the same skills used in handwriting. It is not a replacement for other activities, but it is a great start.
What if my child hates holding a pencil?
Try bigger tools and more playful activities first, such as chalk, paint, playdough and sand trays. Keep sessions short and pressure-free, and return to pencils gradually.
Should my child learn uppercase or lowercase first?
Many teachers begin with uppercase letters because most are made of simple lines and curves. Follow whatever your child’s school uses, if you know it.
How long should pre-writing practice last each day?
Five to fifteen minutes is plenty for most preschoolers. A little every day works better than a long session once a week.
My child is almost 5 and still struggles. Should I worry?
Children develop at different speeds. If you have concerns about your child’s hand control or coordination, it is worth mentioning them to your child’s teacher or pediatrician.
Ready to Start? Get Your Free Printable
Practice is easier with the right materials. Download our free pre-writing worksheet with lines, shapes and tracing patterns for ages 3-5, and follow the five stages at your own pace.
[Download the free printable →] (link to your email signup)
Once your child is comfortable with strokes and shapes, you can move on to our tracing and writing resources to start learning letters with confidence.